


Using Liquid Rescale
The 'Seam Carving' plugin for GIMPSeam Carving is a cool image scaling method, recently invented by some Isreali researchers. Seam carving allows an image to be rescaled, while conserving visually important features. It produces more realistic effects than normal scaling or cropping. You can see more details, and demos, here. Especially, take the time to watch the video - you'll be very impressed! I used seam carving to make some funny animal pictures. Ok, not the most high-brow use, but hey. This page will explain in detail how to use the software I used, to get similar results. The SoftwareI used the free (yes, you don't have to pay a cent) and powerful image-editing program the GIMP. The GIMP is available for Windows, Linux, Mac, and has a whole range of nice effects. Literally infinite value for money - and great value in any case. To follow these instructions, you must first make sure you have installed the GIMP version 2.4 or later. The PluginThe GIMP doesn't come out-of-the-box with Seam Carving, so you'll also need to get the Liquid Rescale plugin. You can get the plugin from here, and also find detailed directions for installing the plugin. These dirctions depend on your operating system. For me (using Fedora 7) it was particularly easy. I logged in as So update your GIMP first, then follow the instructions given on the download web page! The StepsThen, you're ready to Liquidly Rescale your favourite image! First, open the image you want to edit. Using Liquid Rescale out-of-the-box doesn't always work the way you want. However, you can instruct it to preserve (or delete) selected parts of the image. To do this, you need to use 'layers'. So, the first step is to make sure the 'Layers' dialog is visible. 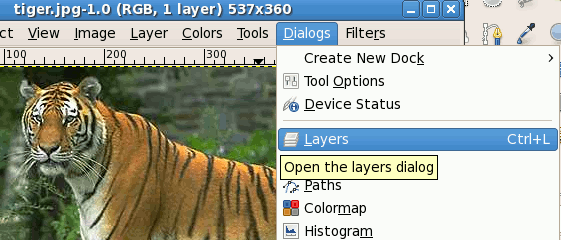 The 'Layers' dialog shows you a list of all the layers in your image. A normal JPEG image doesn't have layers. Or rather, it has only one layer. If you right-click on that layer, and select 'Duplicate Layer', your image will now have two (completely identical) layers.  Any operations you do (drawing, erasing, pasting, etc) are done to the currently selected layer. Here, I've selected the layer 'Background Copy', and I'm selecting the parts fo the tiger that I don't want Liquid Rescale to touch. These include the tiger's face and legs. If you make a selection, you can add to the selection by holding down 'Shift' as you drag to make the next part. 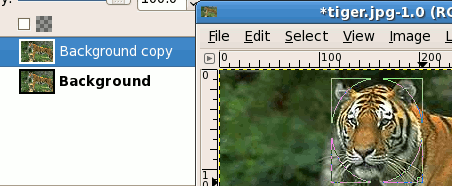 After I've finished selecting, I'll invert the selection. Now, instead of the face and legs being selected, it's everything else that's selected. 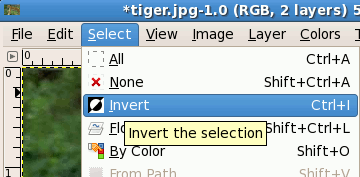 Pressing 'Del', or selecting 'Clear' from the 'Edit' menu, will erase the whole tiger, except the head and legs - but only on the currently selected layer. 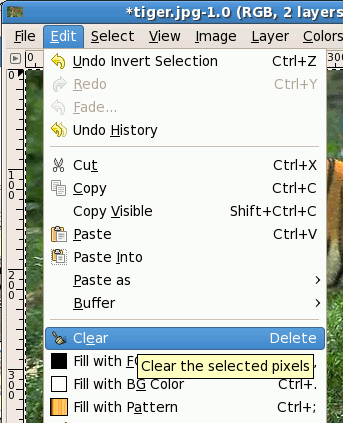 That's right, after clicking 'Del', you won't see any apparent change in the main editing screen. But in the 'Layers' dialog, you can see that most of the layer 'Background Copy' has changed to transparent (which GIMP represents with a grey checkerboard patern). Back on the Layers dialog, select the original Layer (for me, that was 'Background'). Then, in the main editing window, go to the 'Layers' menu, and select 'Liquid Rescale'. If this menu item is not there, perhaps the plugin was not properly installed? 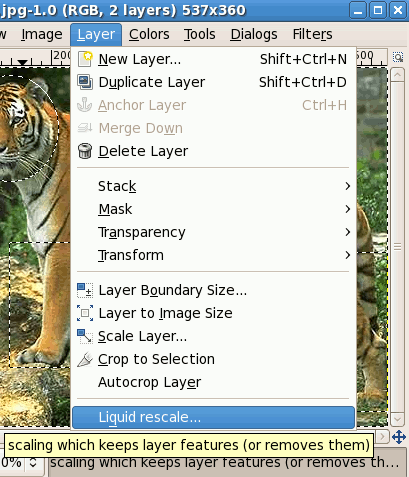 The most basic element of this dialog box is the new size of the image. Here, I've made the image less wide than it was before, because I want my tiger to become shorter. (In the end, I actually pulled the width all the way down to 280px). 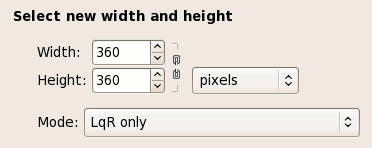 Secondly, at the right-hand side of the dialog, I can choose my 'preserve' mask. This must be a layer, and (of course) I choose the layer I deleted so much image from before. 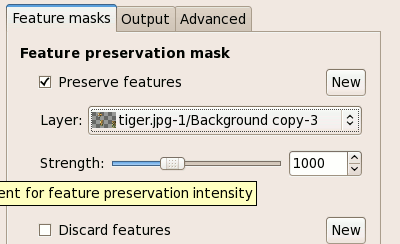 Finally, clicking 'Ok' and waiting, and Liquid Rescale does its job, leaving a cute short tiger for me to save and upload to my website! 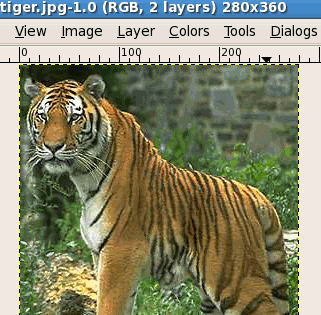 |